
Your Guide to a Simple, Super-Charged Hair Treatment
If your hair feels dry, looks dull, or is just crying out for some love, a deep conditioning mask can feel like a reset button. But to get the full benefits, you need to use it right. I’m talking about more than just slapping it on in the shower. The ROZINO Jamaican Black Castor Oil Hair Mask is packed with great ingredients like castor oil and keratin, but its effectiveness depends on your technique.
I’ve learned this the hard way. Early on, I used to apply masks to my roots thinking it would help a dry scalp, only to end up with flat, oily hair for days. Took me a while to realize that the real magic happens from the mid-lengths down. Let me show you the method that actually works.
What You’ll Need
- The ROZINO Jamaican Black Castor Oil Hair Mask (the star of the show)
- Your regular shampoo and conditioner
- A wide-tooth comb or a detangling brush
- An old towel or a microfiber hair towel
- A shower cap or plastic wrap (optional, but great for an extra boost)
- A timer (your phone works perfectly)
Step-by-Step Guide
Step 1: Start with Clean, Damp Hair
First, wash your hair with your regular shampoo. You want to remove any product buildup or oils so the mask can do its job properly. Don’t worry if your hair has been dyed or treated—this mask is sulfate-free and color-safe, so it won’t strip your color. Rinse thoroughly, then gently squeeze out the excess water with your hands. Pat your hair with a towel until it’s damp, not dripping wet. Hair that’s too wet will dilute the mask; hair that’s too dry won’t let it spread evenly.
Step 2: Detangle Gently
This is a crucial step that many people skip! Take your wide-tooth comb and gently work through any knots, starting from the ends and moving up to the roots. This prevents breakage and ensures the mask can coat every strand evenly later on. This is totally normal if you lose a few hairs here—it’s better than trying to force conditioner through tangles.
Step 3: Apply the Mask Strategically
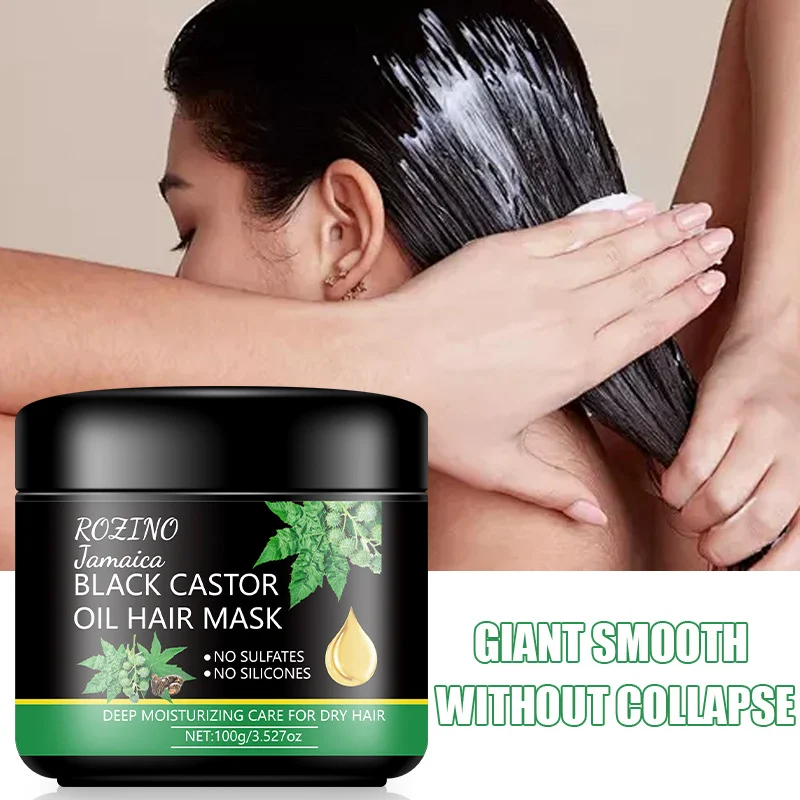
Now for the main event. Scoop out a generous amount of the mask. The amount depends on your hair’s length and thickness—think a walnut-sized dollop for medium-length hair. Here’s the key part: apply it primarily from your mid-lengths to the very ends of your hair. These are the oldest, most damaged parts that need the most nourishment. You can take any leftover product on your fingers and lightly run them over your roots if they are dry, but avoid the scalp area. Massage it through gently to ensure even coverage.
Step 4: Let It Marinate and Penetrate
Once your hair is coated, it’s time to wait. The instructions say 3-5 minutes, which is perfect for a quick weekly treatment. For more intense repair on a really bad hair day, you can leave it on for up to 10-15 minutes. If you want to supercharge the process, wrap your hair in a shower cap. The trapped body heat acts like a mini-steam treatment, helping the oils and keratin sink in deeper. Set a timer so you don’t forget!
Step 5: Rinse, Rinse, Rinse
This might be the most important step. Rinse your hair with cool or lukewarm water until the water runs completely clear. Warm water is okay to start, but a final cool rinse helps seal the hair cuticle, locking in the moisture and boosting shine. Make sure no residue is left behind, as that can weigh your hair down. I like to gently squeeze the length of my hair under the water to help rinse it out thoroughly.
Step 6: Style as Usual
After rinsing, you can follow up with a light conditioner if your hair is extremely dry, but you likely won’t need to. Gently pat your hair dry with a towel—no rough rubbing! Then, style as you normally would. You’ll notice your hair is more manageable, feels softer, and has less frizz even before you dry it.
Pro Tips
Tip 1: Use Heat for a Salon-Level Treatment. After applying the mask and putting on a shower cap, wrap your head in a warm, damp towel or use a blow dryer on a low, warm setting to heat the cap for a minute or two. This deepens the conditioning effect dramatically.
Tip 2: Tailor the Frequency. For maintenance on healthy hair, once a week is plenty. If you’re actively repairing damage from heat or color, using it twice a week for a month can make a visible difference.
Tip 3: Pair with a Pre-Shampoo Oil. For the ultimate moisture session, apply a tiny bit of pure Jamaican black castor oil to your ends 30 minutes before you shampoo, then follow with this mask. It’s a powerhouse combo for dry ends.
Common Mistakes to Avoid
- Applying to the Scalp: This mask is rich and designed for the hair shaft. Putting it directly on your scalp can lead to buildup and make your roots look greasy quickly.
- Rushing the Rinse: Incomplete rinsing is the number one cause of hair feeling heavy or sticky after a mask. Take the extra minute to ensure all product is washed out.
- Using on Soaking Wet Hair: If your hair is dripping, the product slides right off and gets diluted. Towel-dry it to a damp state first for better adhesion and absorption.
Expected Results & Timeline
What can you expect? After just one use, you should feel an immediate difference in softness and slip. Your hair will be easier to comb through and should have noticeably less frizz. The real, cumulative benefits—like improved strength, reduced breakage, and a lasting healthy shine—build up over consistent use. After about 3-4 weekly treatments, you’ll likely see that your hair holds style better, feels stronger, and has a more vibrant look. Because it’s free of sulfates and silicones, there’s no fake coating; you’re getting genuine moisturization and repair.
The product I used: available here.

